实现 WP 版微信的 Pivot Header 效果
Pivot 是 Windows Phone 最常用的一种控件,用户可以通过滑动来切换不同的视图,而切换视图的时候 PivotItem Header (默认)是会变化的——在 WP8.1 的时候是会变到第一个并且高亮显示。而 WP 微信则是采用固定的四个图标当作 Header,而这种效果并不是控件的默认属性,那么我们该怎么实现这个效果呢?
改 Header 的 Style 是一种方法,但是这里我介绍另一种方法(这篇博文用的是 WP8.1 的项目,UWP 也同样适用喔~):
去掉 PivotItem 自己的 Header,用别的容器来装,然后通过 Pivot 的 SelectionChanged 事件来实现样式变化。
0x00 设计页面布局
这里我们把页面分成两部分,上半部分用来放 Header,余下的部分全用来放 PivotItem,xaml 里这样写:
<Grid>
        <Grid.RowDefinitions>
            <RowDefinition Height="auto"/>
            <RowDefinition Height="*"/>
        </Grid.RowDefinitions>
        <Grid Grid.Row="0">
            <!-- 这里用来放 Header -->
        </Grid>
        <Grid Grid.Row="1">
            <!-- 这里用来放 PivotItem-->
        </Grid>
</Grid>
0x01 设计 Header
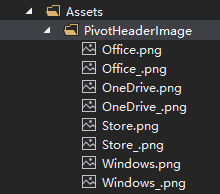
先把准备好的图标加进项目里,我这里准备了四组图标,每组两个(一明一暗,其中暗的以_作为文件名的结尾),我把这些图标放到 \Asset\PivotHeader\Image 里了。

把 Header 所在那个 Grid 里等分成四列,每列一个 StackPanel,里面放我们 Header 的图标、文字什么的。
<Grid.ColumnDefinitions>
    <ColumnDefinition Width="*"/>
    <ColumnDefinition Width="*"/>
    <ColumnDefinition Width="*"/>
    <ColumnDefinition Width="*"/>
</Grid.ColumnDefinitions>
<Grid Grid.Column="0">
    <!-- Tapped 事件是为了让用户点击 Header 的时候也能实现切换 -->
    <StackPanel Tapped="StackPanel0_Tapped" x:Name="Windows">
        <!-- 先让它装入暗的图标,选中的时候再变亮,下面的同理 -->
        <Image x:Name="Windows_Img" Source="ms-appx:///Assets/PivotHeaderImage/Windows_.png" Width="50" Height="50"/>
        <!-- 文字的颜色也同理 -->
        <TextBlock x:Name="Windows_Txt" Foreground="#CCCCCC" FontSize="15" TextAlignment="Center">Windows</TextBlock>
    </StackPanel>
</Grid>
<Grid Grid.Column="1">
    <StackPanel Tapped="StackPanel1_Tapped" x:Name="Office">
        <Image x:Name="Office_Img" Source="ms-appx:///Assets/PivotHeaderImage/Office_.png" Width="50" Height="50"/>
        <TextBlock x:Name="Office_Txt" Foreground="#CCCCCC" FontSize="15" TextAlignment="Center">Office</TextBlock>
</StackPanel>
</Grid>
<Grid Grid.Column="2">
    <StackPanel Tapped="StackPanel2_Tapped" x:Name="OneDrive">
        <Image x:Name="OneDrive_Img" Source="ms-appx:///Assets/PivotHeaderImage/OneDrive_.png" Width="50" Height="50"/>
        <TextBlock x:Name="OneDrive_Txt" Foreground="#CCCCCC" FontSize="15" TextAlignment="Center">OneDrive</TextBlock>
    </StackPanel>
</Grid>
<Grid Grid.Column="3">
    <StackPanel Tapped="StackPanel3_Tapped" x:Name="Store">
        <Image x:Name="Store_Img" Source="ms-appx:///Assets/PivotHeaderImage/Store_.png" Width="50" Height="50"/>
        <TextBlock x:Name="Store_Txt" Foreground="#CCCCCC" FontSize="15" TextAlignment="Center">Store</TextBlock>
    </StackPanel>
</Grid>
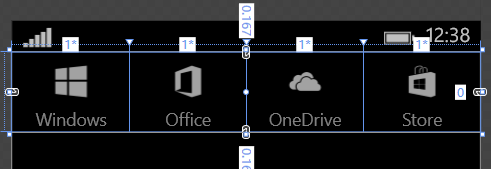
效果是这样的:

0x02 添加 PivotItem
准备好了 Header,下面我们要添加四个(对应四个 Header) PivotItem 了。在页面下半部分那个 Grid 里添加一个 Pivot:
<Pivot x:Name="MyPivot" SelectionChanged="MyPivot_SelectionChanged">
    <PivotItem>
        <Grid>
            <!-- PivotItem0 -->
        </Grid>
    </PivotItem>
    <PivotItem>
        <Grid>
            <!-- PivotItem1 -->
        </Grid>
    </PivotItem>
    <PivotItem>
        <Grid>
            <!-- PivotItem2 -->
        </Grid>
    </PivotItem>
    <PivotItem>
        <Grid>
            <!-- PivotItem3 -->
        </Grid>
    </PivotItem>
</Pivot>
0x03 添加切换事件
首先我们要先有一个变量,用来记录切换前 Pivot 的 index,所以我们先定义一个整型变量并让其初始化为 0,int PreIndex = 0;;为什么要有这个变量呢,有了它之后我们就可以在切换时直接准确地把切换前的 Header 变成暗的,这样效率会略有提高(我猜的 -_-|||)。
然后添加 SelectionChanged 事件处理程序 MyPivot_SelectionChanged
// MyPivot 的前一个索引
int PreIndex = 0;

private void MyPivot_SelectionChanged(object sender, SelectionChangedEventArgs e)
{
    // 将变换前的 Header 变“暗”
    switch(PreIndex)
    {
        case 0:
            Windows_Img.Source = new BitmapImage(new Uri("ms-appx:///Assets/PivotHeaderImage/Windows_.png"));
            Windows_Txt.Foreground = new SolidColorBrush(Color.FromArgb(255, 128, 128, 128));
            break;
        case 1:
            Office_Img.Source = new BitmapImage(new Uri("ms-appx:///Assets/PivotHeaderImage/Office_.png"));
            Office_Txt.Foreground = new SolidColorBrush(Color.FromArgb(255, 128, 128, 128));
            break;
        case 2:
            OneDrive_Img.Source = new BitmapImage(new Uri("ms-appx:///Assets/PivotHeaderImage/OneDrive_.png"));
            OneDrive_Txt.Foreground = new SolidColorBrush(Color.FromArgb(255, 128, 128, 128));
            break;
        case 3:
            Store_Img.Source = new BitmapImage(new Uri("ms-appx:///Assets/PivotHeaderImage/Store_.png"));
            Store_Txt.Foreground = new SolidColorBrush(Color.FromArgb(255, 128, 128, 128));
            break;
    }
    // 当前的 Index 将会变成“切换前”的 Index
    PreIndex = (sender as Pivot).SelectedIndex;

    // 将当前的 Header 变“亮”
    switch ((sender as Pivot).SelectedIndex)
    {
        case 0:
            Windows_Img.Source = new BitmapImage(new Uri("ms-appx:///Assets/PivotHeaderImage/Windows.png"));
            Windows_Txt.Foreground = new SolidColorBrush(Color.FromArgb(255, 255, 255, 255));
            break;
        case 1:
            Office_Img.Source = new BitmapImage(new Uri("ms-appx:///Assets/PivotHeaderImage/Office.png"));
            Office_Txt.Foreground = new SolidColorBrush(Color.FromArgb(255, 255, 255, 255));
            break;
        case 2:
            OneDrive_Img.Source = new BitmapImage(new Uri("ms-appx:///Assets/PivotHeaderImage/OneDrive.png"));
            OneDrive_Txt.Foreground = new SolidColorBrush(Color.FromArgb(255, 255, 255, 255));
            break;
        case 3:
            Store_Img.Source = new BitmapImage(new Uri("ms-appx:///Assets/PivotHeaderImage/Store.png"));
            Store_Txt.Foreground = new SolidColorBrush(Color.FromArgb(255, 255, 255, 255));
            break;
    }
}
别忘了添加一下 Header 的 Tapped 事件
private void StackPanel0_Tapped(object sender, TappedRoutedEventArgs e)
{
    MyPivot.SelectedIndex = 0;
}
private void StackPanel1_Tapped(object sender, TappedRoutedEventArgs e)
{
    MyPivot.SelectedIndex = 1;
}
private void StackPanel2_Tapped(object sender, TappedRoutedEventArgs e)
{
    MyPivot.SelectedIndex = 2;
}
private void StackPanel3_Tapped(object sender, TappedRoutedEventArgs e)
{
    MyPivot.SelectedIndex = 3;
}
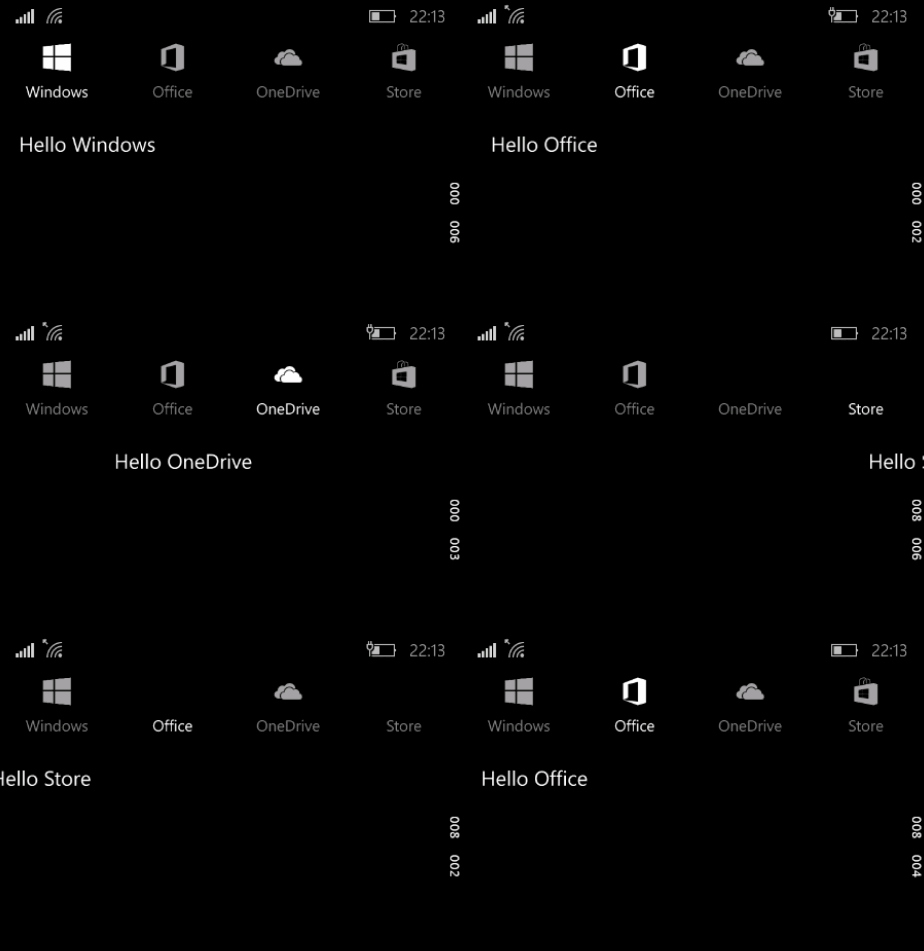
好了,看一下效果吧~

诶?Header 的图标会闪?没错,不是你的网络啊浏览器啊什么的有问题,是真的会闪!因为每次切换时都要加载图片,这样会略有延迟,可是微信的是没有闪动的,切换很流畅的!
0x04 优化!
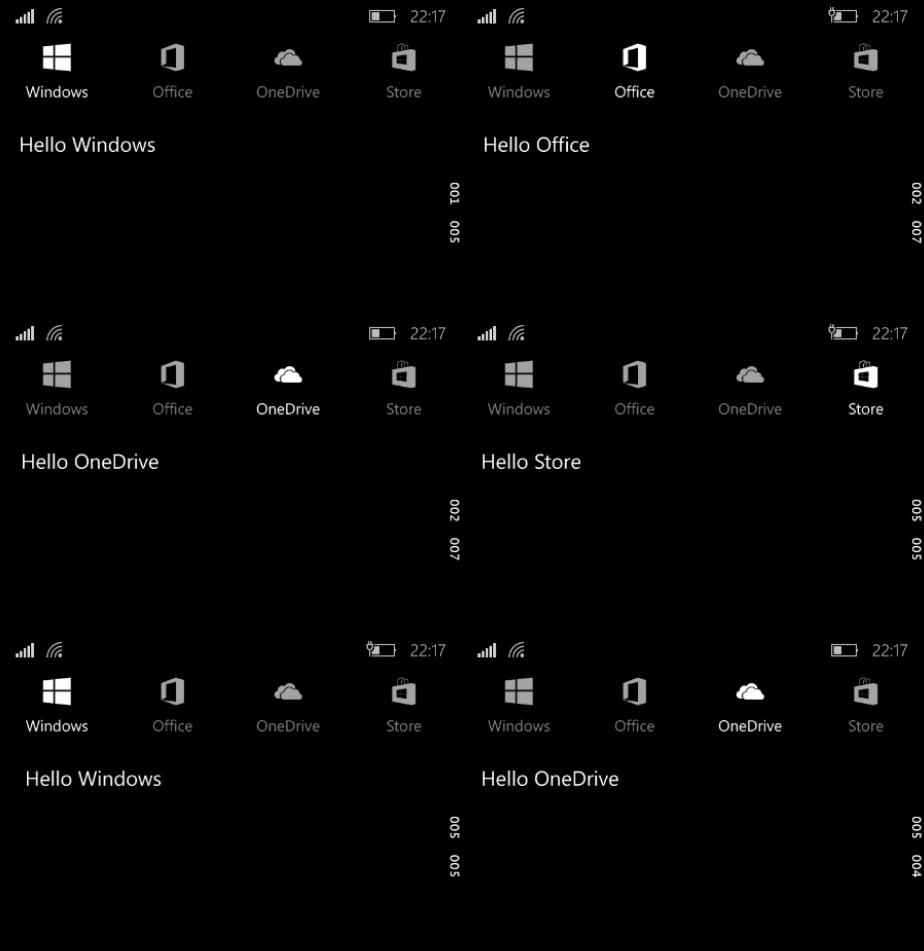
先放张图看下优化后的效果:

很流畅对吧(我没有对这个 gif 做手脚,是真的优化过~)。
要达到这种流畅的效果,我们需要将每组两个图标都先加载进来,怎么实现呢,用两个 StackPanel 分别装亮和暗时的 Header,不同状态显示对应的 StackPanel 就行了嘛!
那么我们需要修改一下上半部分的 Grid:
<Grid Grid.Column="0">
    <StackPanel Tapped="StackPanel0_Tapped" x:Name="Windows" Visibility="Collapsed">
        <Image Source="ms-appx:///Assets/PivotHeaderImage/Windows.png" Width="50" Height="50"/>
        <TextBlock FontSize="15" TextAlignment="Center">Windows</TextBlock>
    </StackPanel>
    <StackPanel Tapped="StackPanel0_Tapped" x:Name="Windows_">
        <Image Source="ms-appx:///Assets/PivotHeaderImage/Windows_.png" Width="50" Height="50"/>
        <TextBlock FontSize="15" TextAlignment="Center" Foreground="Gray">Windows</TextBlock>
    </StackPanel>
</Grid>
<Grid Grid.Column="1">
    <StackPanel Tapped="StackPanel1_Tapped" x:Name="Office" Visibility="Collapsed">
        <Image Source="ms-appx:///Assets/PivotHeaderImage/Office.png" Width="50" Height="50"/>
        <TextBlock FontSize="15" TextAlignment="Center">Office</TextBlock>
    </StackPanel>
    <StackPanel Tapped="StackPanel1_Tapped" x:Name="Office_">
        <Image Source="ms-appx:///Assets/PivotHeaderImage/Office_.png" Width="50" Height="50"/>
        <TextBlock FontSize="15" TextAlignment="Center" Foreground="Gray">Office</TextBlock>
    </StackPanel>
</Grid>
<Grid Grid.Column="2">
    <StackPanel Tapped="StackPanel2_Tapped" x:Name="OneDrive" Visibility="Collapsed">
        <Image Source="ms-appx:///Assets/PivotHeaderImage/OneDrive.png" Width="50" Height="50"/>
        <TextBlock FontSize="15" TextAlignment="Center">OneDrive</TextBlock>
    </StackPanel>
    <StackPanel Tapped="StackPanel2_Tapped" x:Name="OneDrive_">
        <Image Source="ms-appx:///Assets/PivotHeaderImage/OneDrive_.png" Width="50" Height="50"/>
        <TextBlock FontSize="15" TextAlignment="Center" Foreground="Gray">OneDrive</TextBlock>
    </StackPanel>
</Grid>
<Grid Grid.Column="3">
    <StackPanel Tapped="StackPanel3_Tapped" x:Name="Store" Visibility="Collapsed">
        <Image Source="ms-appx:///Assets/PivotHeaderImage/Store.png" Width="50" Height="50"/>
        <TextBlock FontSize="15" TextAlignment="Center"  x:Name="SPT3">Store</TextBlock>
    </StackPanel>
    <StackPanel Tapped="StackPanel3_Tapped" x:Name="Store_">
        <Image Source="ms-appx:///Assets/PivotHeaderImage/Store_.png" Width="50" Height="50"/>
        <TextBlock FontSize="15" TextAlignment="Center" Foreground="Gray">Store</TextBlock>
    </StackPanel>
</Grid>
然后对应修改一下 SelectionChanged
private void MyPivot_SelectionChanged(object sender, SelectionChangedEventArgs e)
{
    switch(PreIndex)
    {
        case 0:
            Windows.Visibility = Visibility.Collapsed;
            Windows_.Visibility = Visibility.Visible;
            break;
        case 1:
            Office.Visibility = Visibility.Collapsed;
            Office_.Visibility = Visibility.Visible;
            break;
        case 2:
            OneDrive.Visibility = Visibility.Collapsed;
            OneDrive_.Visibility = Visibility.Visible;
            break;
        case 3:
            Store.Visibility = Visibility.Collapsed;
            Store_.Visibility = Visibility.Visible;
            break;
    }
    PreIndex = (sender as Pivot).SelectedIndex;

    switch ((sender as Pivot).SelectedIndex)
    {
        case 0:
            Windows_.Visibility = Visibility.Collapsed;
            Windows.Visibility = Visibility.Visible;
            break;
        case 1:
            Office_.Visibility = Visibility.Collapsed;
            Office.Visibility = Visibility.Visible;
            break;
        case 2:
            OneDrive_.Visibility = Visibility.Collapsed;
            OneDrive.Visibility = Visibility.Visible;
            break;
        case 3:
            Store_.Visibility = Visibility.Collapsed;
            Store.Visibility = Visibility.Visible;
            break;
    }
}
好了,运行一下看看吧~
前几天看 MSDN 博客侠 的文章《Win 10 UWP开发系列:设置AppBarButton的图标》看到一款制作图标的神器——Merto Studio 4,本文用的图标就是直接从这个软件里导出来的~
博主还有没有实例代码了,想看一下
工程文件我找不到了,基本上就是博文里贴出来的代码~
这就很厉害了